理解 topics
目标: 使用 rqt_graph 和命令行工具与 ROS 2 topics 交互.
教程等级: 初级
预计时长: 20 分钟
背景
ROS 2 将复杂的系统分解为许多模块化节点。 Topics 像总线(bus)一样让节点之间交换数据,是 ROS 图中的重要元素。
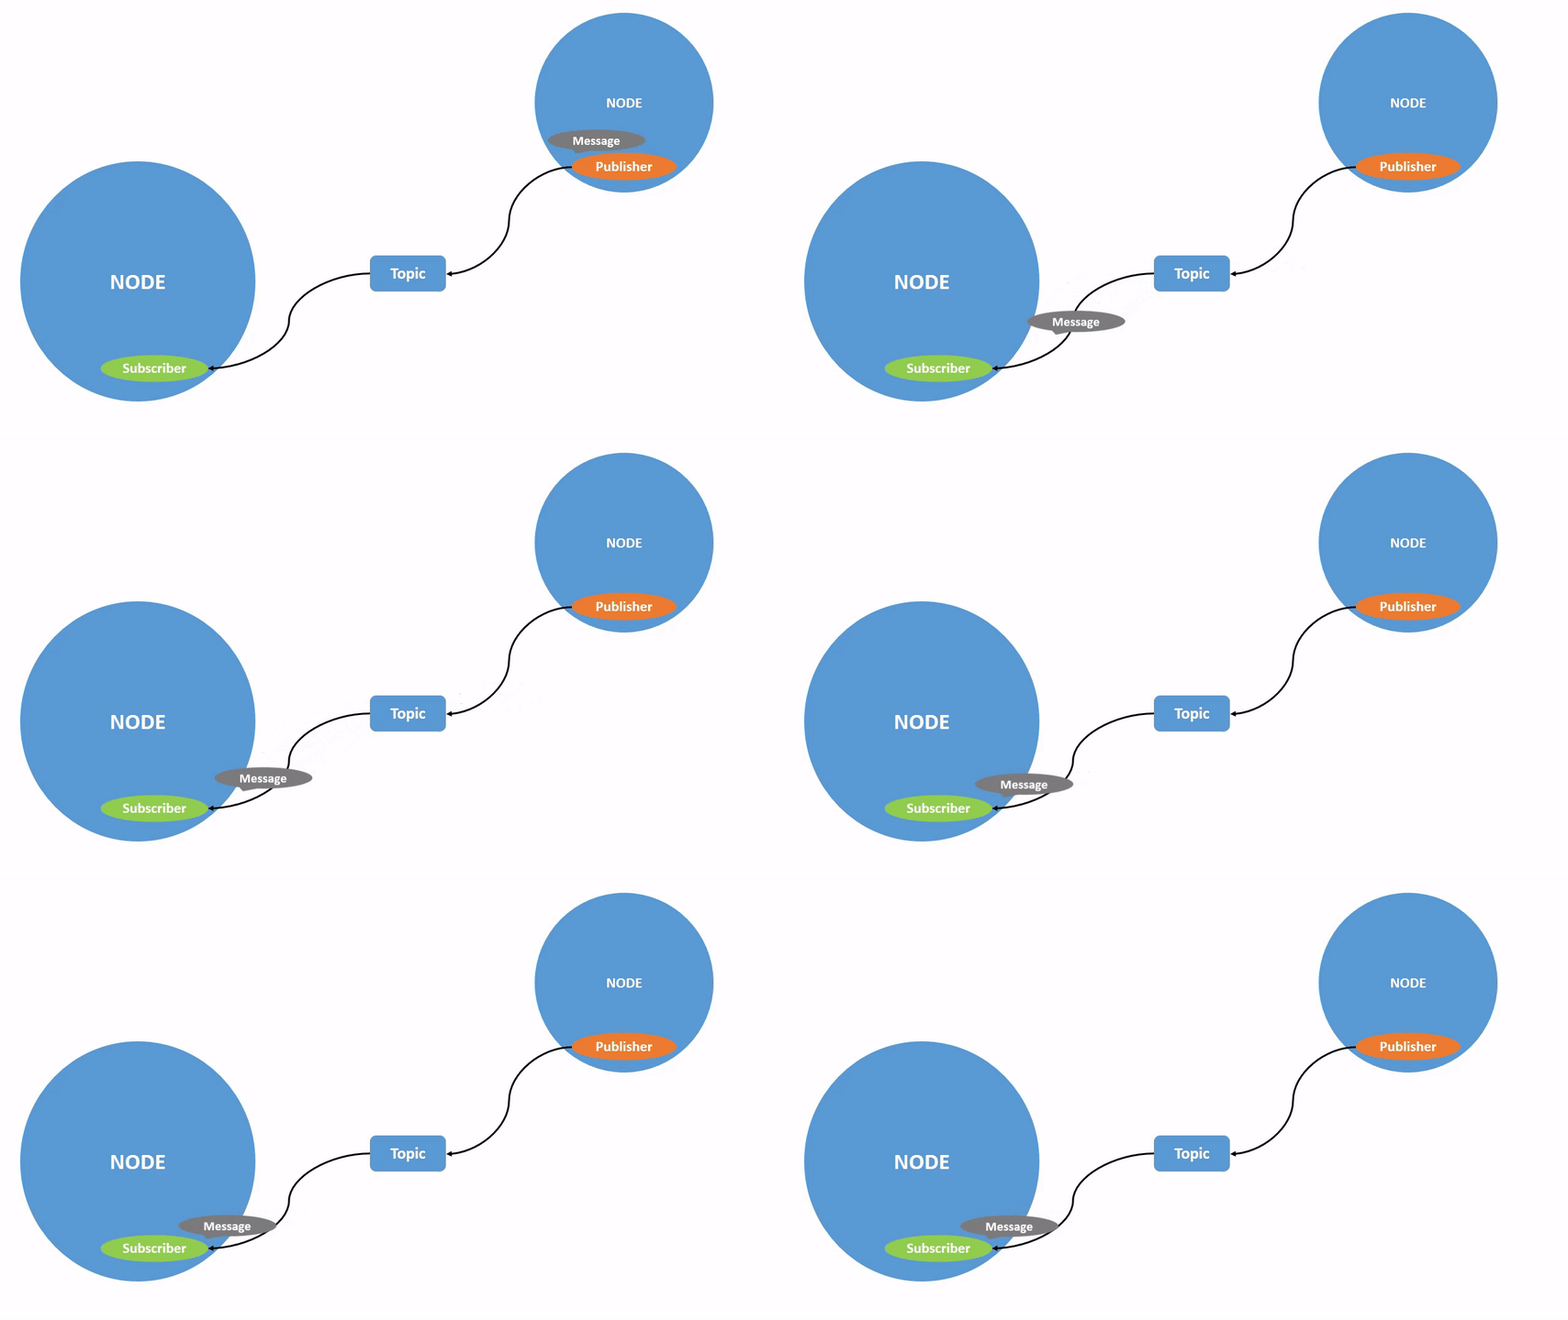
一个节点可以发布数据到任意数量的 topics,并同时订阅任意数量的 topics。
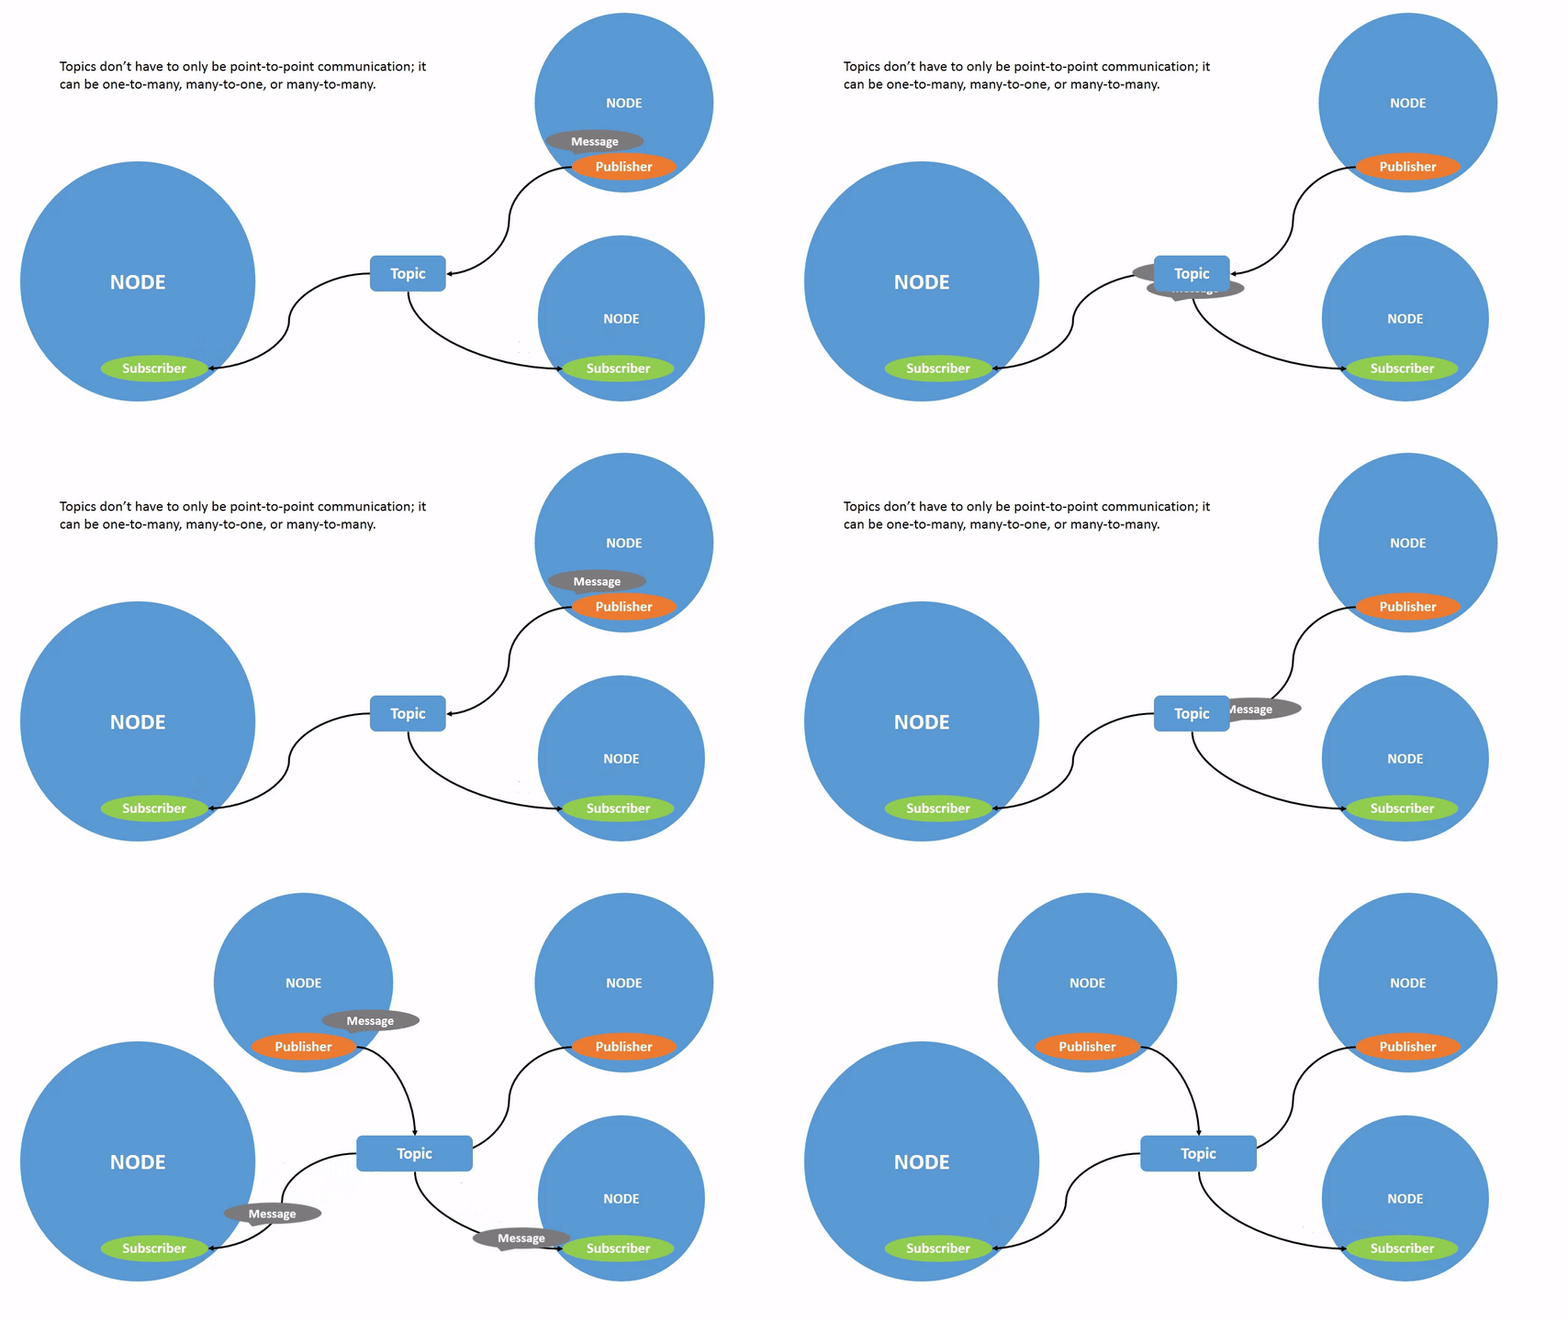
Topics 是数据在节点之间和系统不同部分之间传递的主要方式之一。
前提条件
上一个教程 提供了一些关于节点的背景信息,这个教程会在此基础上继续。
和之前一样,不要忘记在 每次打开新终端时 source ROS 2。
任务
1 准备工作
现在你应该已经熟悉了如何启动 turtlesim。
打开一个新终端并运行:
ros2 run turtlesim turtlesim_node
打开另一个终端并运行:
ros2 run turtlesim turtle_teleop_key
从 上一个教程 中可以知道,这两个节点的默认名称分别是 /turtlesim 和 /teleop_turtle。
2 rqt_graph
在本教程中,我们将使用 rqt_graph 来可视化变化的节点和 topics,以及它们之间的连接关系。
turtlesim 教程 已经告诉你如何安装 rqt 及其插件,包括 rqt_graph。
打开一个新终端并输入以下命令运行 rqt_graph:
rqt_graph
你也可以通过打开 rqt 并选择 Plugins > Introspection > Node Graph 来打开 rqt_graph。
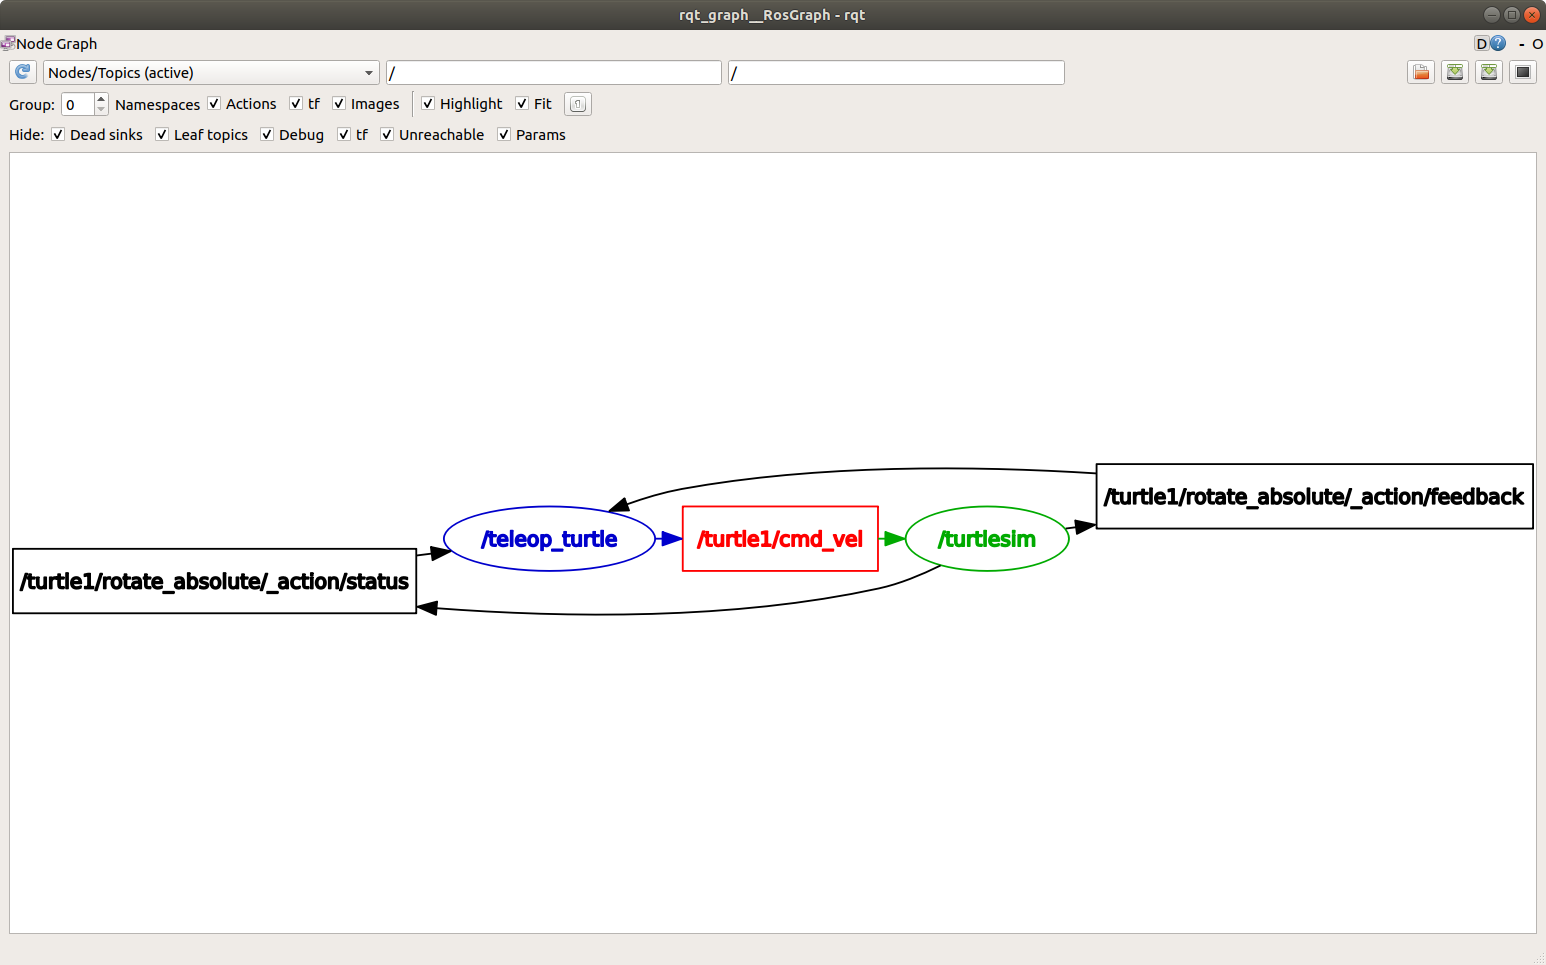
你应该能看到上图中的节点和 topic,以及图中周围的两个 actions (现在我们先忽略 actions )。 当你将鼠标悬停在中心的 topic 上时,你会看到像上图中那样的颜色高亮。
这个图展示了 /turtlesim 节点和 /teleop_turtle 节点如何通过一个 topic 进行通信。
/teleop_turtle 节点发布数据(你输入的按键来移动乌龟),发布到 /turtle1/cmd_vel topic,而 /turtlesim 节点订阅该 topic 来接收数据。
rqt_graph 的高亮功能在检查连接了许多不同节点和 topic 的复杂系统时非常有用。
rqt_graph 是一个图形化的 introspection 工具。 现在我们将看一些用于 introspecting topics 的命令行工具。(译者注:一些与 topic 交互,包括检查状态、收发数据等功能的工具。)
3 ros2 topic list
在新终端中运行 ros2 topic list 命令将返回系统中当前运行中(active)的所有 topics 的列表:
/parameter_events
/rosout
/turtle1/cmd_vel
/turtle1/color_sensor
/turtle1/pose
ros2 topic list -t 将返回相同的 topics 列表,但是在括号中附加了 topic 类型:
/parameter_events [rcl_interfaces/msg/ParameterEvent]
/rosout [rcl_interfaces/msg/Log]
/turtle1/cmd_vel [geometry_msgs/msg/Twist]
/turtle1/color_sensor [turtlesim/msg/Color]
/turtle1/pose [turtlesim/msg/Pose]
这些属性,特别是类型,使得不同节点能够在信息在 topics 上传递时,知晓不同节点在交换同样对应的信息。
如果你想知道这些 topics 在 rqt_graph 中的位置,你可以取消勾选 Hide: 下的所有选项:
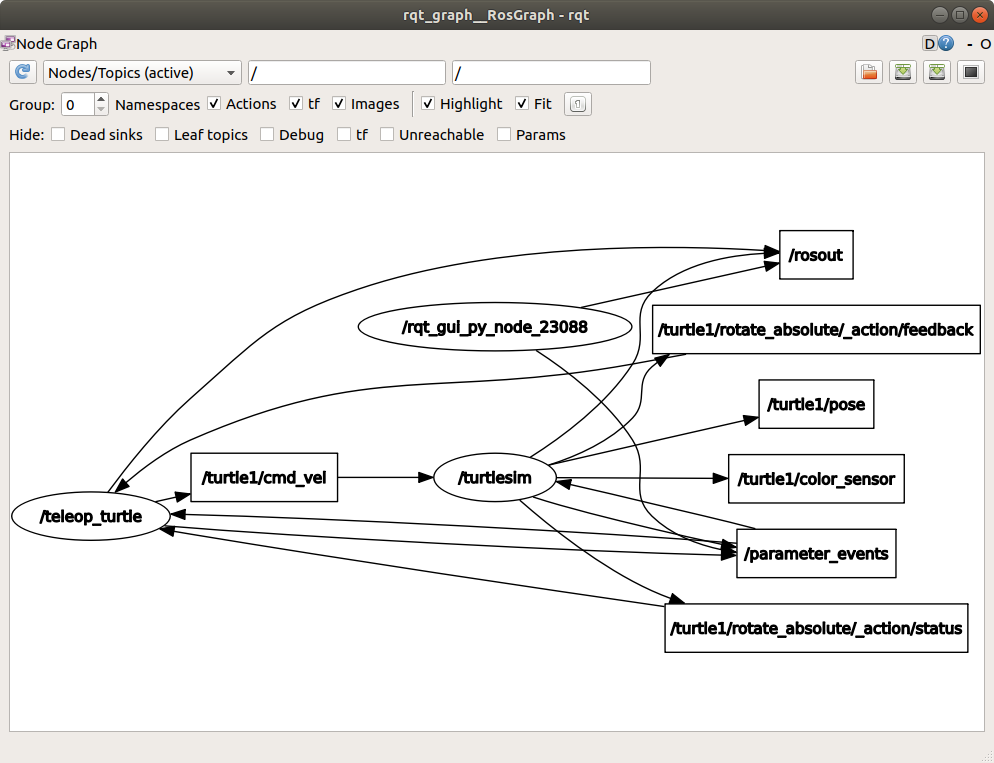
不过暂时我们还是保持这些选项勾选,以避免看起来太乱导致的混淆。
4 ros2 topic echo
要查看在某个 topic 上发布的数据,使用:
ros2 topic echo <topic_name>
因为我们知道 /teleop_turtle 在 /turtlesim 上发布数据,通过 /turtle1/cmd_vel topic,让我们使用 echo 来 introspect 这个 topic:
ros2 topic echo /turtle1/cmd_vel
一开始,这个命令不会返回任何数据。
这是因为它在等待 /teleop_turtle 发布数据。
回到 turtle_teleop_key 运行的终端,使用方向键移动乌龟。
同时观察 echo 运行的终端,你会看到每次移动都会发布位置数据:
linear:
  x: 2.0
  y: 0.0
  z: 0.0
angular:
  x: 0.0
  y: 0.0
  z: 0.0
  ---
现在回到 rqt_graph 并取消勾选 Debug 选项。

你会看到 /_ros2cli_26646 是刚刚运行的 echo 命令创建的节点(数字可能不同)。
现在你可以看到发布者在 cmd_vel topic 上发布数据,有两个订阅者订阅了它。
5 ros2 topic info
Topics 不仅局限于一对一的通信;它们可以是一对多、多对一或多对多的。
另外一个查看通信情况的方式是运行:
ros2 topic info /turtle1/cmd_vel
这将返回:
Type: geometry_msgs/msg/Twist
Publisher count: 1
Subscription count: 2
6 ros2 interface show
节点(nodes)使用消息(message)在 topics 上发送数据。 发布者(publishers)和订阅者(subscribers)必须发送和接收相同类型的消息才能通信。
我们在运行 ros2 topic list -t 后看到的 topic 类型让我们知道每个 topic 使用的消息类型。
还记得 cmd_vel topic 的类型是:
geometry_msgs/msg/Twist
这意味着在 geometry_msgs 包中有一个叫 Twist 的 msg。
现在我们可以运行 ros2 interface show <msg_type> 来了解消息的细节。
具体来说,就是消息期望的数据结构是什么。
ros2 interface show geometry_msgs/msg/Twist
对于上面的消息类型,它返回:
# This expresses velocity in free space broken into its linear and angular parts.

    Vector3  linear
            float64 x
            float64 y
            float64 z
    Vector3  angular
            float64 x
            float64 y
            float64 z
这告诉你 /turtlesim 节点期望一个包含两个向量的消息, linear 和 angular,每个向量有三个元素。
如果你还记得我们用 echo 命令看到 /teleop_turtle 传递给 /turtlesim 的数据,它就是这个结构:
linear:
  x: 2.0
  y: 0.0
  z: 0.0
angular:
  x: 0.0
  y: 0.0
  z: 0.0
  ---
7 ros2 topic pub
现在你知道了消息结构,你可以直接从命令行发布数据到某个 topic:
ros2 topic pub <topic_name> <msg_type> '<args>'
'<args>' 参数是你将传递给 topic 的实际数据,描述在你在上一节发现的那个数据结构里。
小乌龟(当然也是通常情况下它所代指/仿真的机器人真机)需要一个稳定的命令流来连续地控制移动。 所以,为了让小乌龟移动并保持移动,你可以使用以下命令。 很重要的一点是这个参数需要使用 YAML 语法输入。 输入完整的命令如下:
ros2 topic pub /turtle1/cmd_vel geometry_msgs/msg/Twist "{linear: {x: 2.0, y: 0.0, z: 0.0}, angular: {x: 0.0, y: 0.0, z: 1.8}}"
在没有额外的命令行选项时,ros2 topic pub 以 1 Hz 的速率连续发布命令。
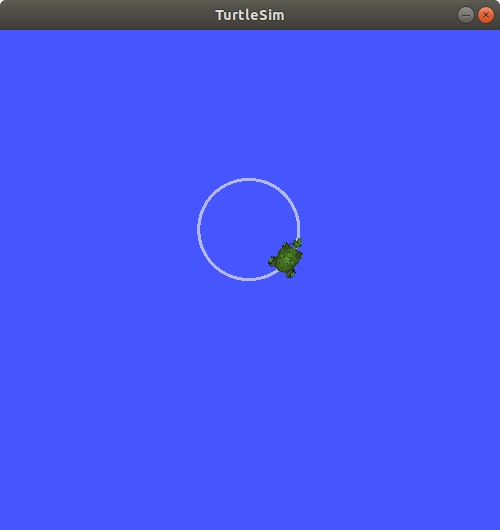
有时你可能只想向 topic 发布一次数据(而不是连续发布)。
这时你可以添加 --once 选项。
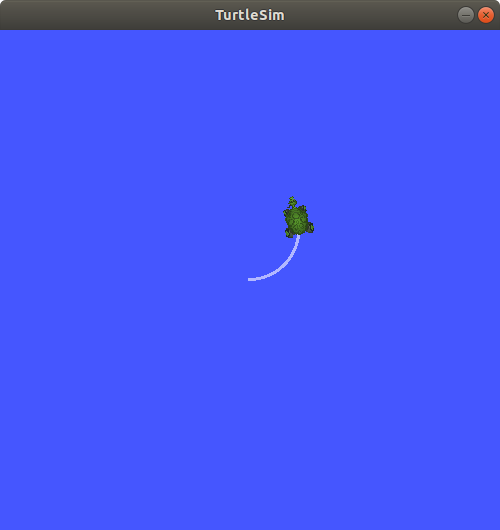
ros2 topic pub --once -w 2 /turtle1/cmd_vel geometry_msgs/msg/Twist "{linear: {x: 2.0, y: 0.0, z: 0.0}, angular: {x: 0.0, y: 0.0, z: 1.8}}"
--once 是一个可选参数,意味着“发布一次消息然后退出”。
-w 2 是一个可选参数,意味着“等待两个匹配的订阅”。
这个场景下需要这个参数,因为我们既有 turtlesim 也有 topic echo 订阅了这个 topic。
你会在终端看到以下输出:
Waiting for at least 2 matching subscription(s)...
publisher: beginning loop
publishing #1: geometry_msgs.msg.Twist(linear=geometry_msgs.msg.Vector3(x=2.0, y=0.0, z=0.0), angular=geometry_msgs.msg.Vector3(x=0.0, y=0.0, z=1.8))
然后你会看到小乌龟移动:
你可以刷新 rqt_graph 来查看发生了什么。
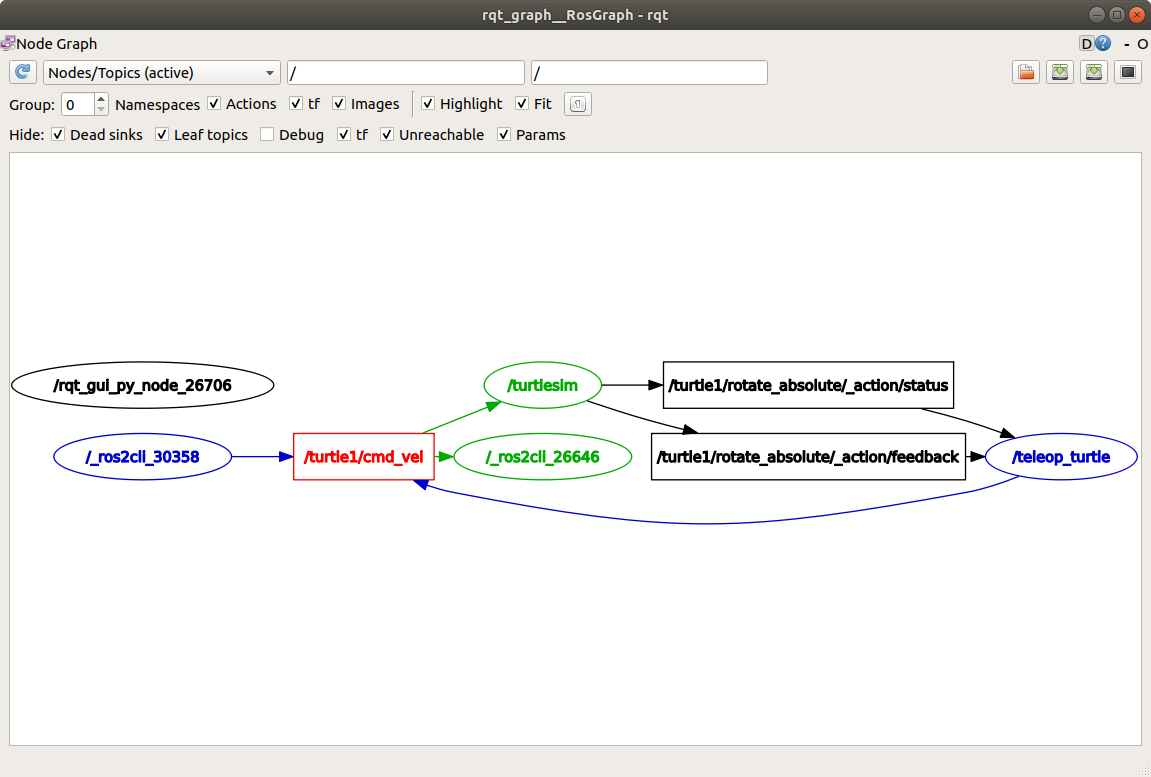
你会看到 ros2 topic pub ... 节点( /_ros2cli_30358 )正在 /turtle1/cmd_vel topic 上发布数据,这个数据被 ros2 topic echo ... 节点( /_ros2cli_26646 )和 /turtlesim 节点接收到了。
最后,你可以在 pose topic 上运行 echo 命令并重新检查 rqt_graph:
ros2 topic echo /turtle1/pose
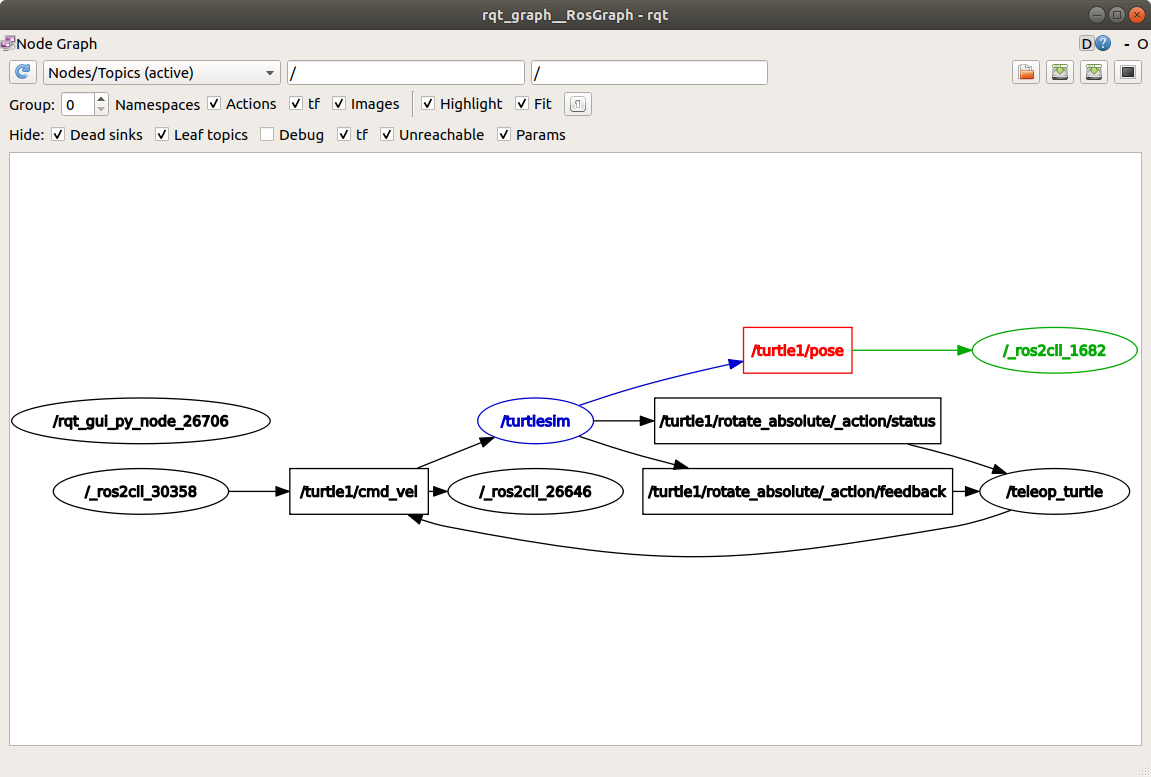
你会看到 /turtlesim 节点也在 pose topic 上发布数据,新的 echo 节点已经订阅了这个 topic。
当发布带有时间戳的消息时,pub 有两种方法可以自动填充当前时间。
对于带有 std_msgs/msg/Header 的消息,可以将 header 字段设置为 auto 来填充 stamp 字段。
ros2 topic pub /pose geometry_msgs/msg/PoseStamped '{header: "auto", pose: {position: {x: 1.0, y: 2.0, z: 3.0}}}'
如果消息不使用完整的头部(header),而只是一个带有类型为 builtin_interfaces/msg/Time 的字段,可以将其设置为值 now。
ros2 topic pub /reference sensor_msgs/msg/TimeReference '{header: "auto", time_ref: "now", source: "dumy"}'
8 ros2 topic hz
You can also view the rate at which data is published using:
ros2 topic hz /turtle1/pose
它会返回 /turtlesim 节点发布数据到 pose topic 的速率。
average rate: 59.354
  min: 0.005s max: 0.027s std dev: 0.00284s window: 58
回想一下,你使用 ros2 topic pub --rate 1 设置 turtle1/cmd_vel 的发布速率为稳定的 1 Hz。
如果你用 turtle1/cmd_vel 替换上面的命令,你会看到一个反映这个速率的平均值。
Note
The rate reflects the receiving rate on the subscription created by the ros2 topic hz command, which might be affected by platform resources and QoS configuration, and may not exactly match the publisher rate.
9 ros2 topic bw
The bandwidth used by a topic can be viewed using:
ros2 topic bw /turtle1/pose
It returns the bandwidth utilization and number of messages being published to the /turtle1/pose topic.
Subscribed to [/turtle1/pose]
1.51 KB/s from 62 messages
    Message size mean: 0.02 KB min: 0.02 KB max: 0.02 KB
Note
The bandwidth reflects the receiving rate on the subscription created by the ros2 topic bw command, which might be affected by platform resources and QoS configuration, and may not exactly match the publisher’s bandwidth.
10 ros2 topic find
To list a list of available topics of a given type use:
ros2 topic find <topic_type>
Recall that the cmd_vel topic has the type:
geometry_msgs/msg/Twist
Using the find command outputs topics available when given the message type:
ros2 topic find geometry_msgs/msg/Twist
This outputs:
/turtle1/cmd_vel
11 Clean up
现在你已经有很多节点在运行。
不要忘记在每个终端中使用 Ctrl+C 来停止它们。
总结
在 ROS 2 系统中,节点通过 topics 发布信息,这允许任意数量的其他节点订阅并访问该信息。 在本教程中,你使用 rqt_graph 和命令行工具检查了几个节点之间的连接关系。 现在你应该对 ROS 2 系统中数据的传递有了一个很好的了解。
下一步
接下来你将学习 ROS 图中另一种通信类型,查看教程 理解服务.