创建工作空间
目标: 创建工作空间,并学习如何配置开发和测试使用的 overlay .
教程等级: 初级
预计时长: 20 分钟
背景
工作空间是一个包含有 ROS 2 包的文件夹。 在使用 ROS 2 之前,需要在终端中 source ROS 2 的环境。 这样你就能在终端中使用 ROS 2 自带的包了。
你也可以选择使用 “overlay”(就是一个次级工作空间),这样在其中添加新的包就不会干扰现有的 ROS 2 工作空间(也就是 “underlay”)。 underlay 必须包含 overlay 中所有包的依赖。 overlay 中的包会覆盖(override) underlay 中的包。 overlay 也可以有多层 underlay 和 overlay,每个 overlay 都使用其父 underlay 的包。(译者注:overlay 和 underlay 都是相对的概念,被依赖的都是 underlay,依赖 underlay 的都是 overlay。)
前提条件
理解基本的命令行指令 (here’s a guide for Linux)
你想用的任意文本编辑器
任务
1 Source ROS 2 环境
在这个教程中,ROS 2 的安装环境就是你的 underlay。 (请注意,underlay 不一定是 ROS 2 的安装环境。)
source 所用的指令会由于你的安装方式和部署平台的不同而有所变化。
source /opt/ros/humble/setup.bash
. ~/ros2_install/ros2-osx/setup.bash
Remember to use a x64 Native Tools Command Prompt for VS 2019 for executing the following commands, as we are going to build a workspace.
call C:\dev\ros2\local_setup.bat
如果这些指令对你的环境没有作用,请查看你所遵循的 安装指南。
2 创建新文件夹
最好能够为每个新工作空间都创建一个新的文件夹。
文件夹的名字不重要,但最好能够表明工作空间的用途。
让我们选择 ros2_ws 作为文件夹名字,表示 “development workspace”:
mkdir -p ~/ros2_ws/src
cd ~/ros2_ws/src
mkdir -p ~/ros2_ws/src
cd ~/ros2_ws/src
md \ros2_ws\src
cd \ros2_ws\src
另外一个建议是把工作空间中的包都放在 src 目录下。
前面给出的指令就在 ros2_ws 文件夹下创建了一个 src 文件夹,并进入了这个文件夹。
3 克隆样例仓库
在 ros2_ws/src 目录下,克隆一个样例仓库。
在后续的初级教程中,你可能会创建自己的包,但现在你可以练习使用已有的包来组建工作空间。
如果你已经完成了 初级: CLI 工具 教程,那应该已经熟悉了 turtlesim 这个包,它是 ros_tutorials 的一部分.
一个仓库可以有多个分支。
你需要检出(check out)一个针匹配你的 ROS 2 版本的分支。
当你克隆仓库时,使用 -b 参数,加那个分支的名字就能直接切换到那个分支。
在 ros2_ws/src 目录下,运行以下指令:
git clone https://github.com/ros/ros_tutorials.git -b humble
现在 ros_tutorials 就被克隆到你的工作空间了。 ros_tutorials 仓库包含了 turtlesim 包,我们会在后续的教程中使用它。
这个仓库中的其他包不会被构建,因为那些文件夹里有 COLCON_IGNORE 文件。
现在,你已经在工作空间中放好了一个样例包,但这还不是一个功能健全的工作空间。 需要先安装依赖,然后再构建工作空间。
4 安装依赖
在构建工作空间之前,需要先安装包的依赖。 你可能已经安装了相关的依赖,但最好还是检查一下。 你应该不希望等了很久构建失败之后才发现缺少了依赖。
在工作空间的根目录( ros2_ws )下,运行以下指令:
# cd if you're still in the ``src`` directory with the ``ros_tutorials`` clone
cd ..
rosdep install -i --from-path src --rosdistro humble -y
rosdep only runs on Linux, so you can skip ahead to section “5 Build the workspace with colcon”.
rosdep only runs on Linux, so you can skip ahead to section “5 Build the workspace with colcon”.
如果你是从源码或二进制包安装的 ROS 2,则需要使用 ROS 2 安装指南中的 rosdep 指令。
这里是 源码安装 rosdep 部分 和 二进制包 rosdep 部分 的资料。
如果你已经安装了所有依赖,那么终端会返回:
#All required rosdeps installed successfully
package.xml 文件中声明了包的依赖关系(你会在下一个教程中学到更多关于包的知识)。
这个指令会遍历这些声明,然后安装缺少的依赖。
你可以在另一个教程中(即将推出)了解更多关于 rosdep 的知识。
5 使用 colcon 构建工作空间
从工作空间的根目录( ros2_ws )下,运行以下指令:
colcon build
colcon build
colcon build --merge-install
Windows doesn’t allow long paths, so merge-install will combine all the paths into the install directory.
终端会返回以下信息:
Starting >>> turtlesim
Finished <<< turtlesim [5.49s]

Summary: 1 package finished [5.58s]
Note
其它有用的 colcon build 参数:
--packages-up-to只构建你想要的包及其依赖,而不是整个工作空间(节省时间)--symlink-install你可以在修改 python 脚本后不用每次都重新构建--event-handlers console_direct+构建时显示控制台输出(否则在log目录中查找日志)--executor sequential一个接一个地处理包,而不是并行处理
构建完成后,在工作空间根目录(~/ros2_ws)下运行以下指令:
ls
ls
dir
你会看到 colcon 创建了新的目录:
build install log src
install 目录是工作空间的配置文件,你可以用它来 source 你的 overlay。
6 Source the overlay
在 source overlay 之前,请注意要打开一个新的终端,和构建工作空间用的不一样的终端,这一点很重要。 在与 underlay 同一个终端中 source overlay,或者在 source overlay 的环境中再构建 overlay,可能会导致复杂的问题。
在新的终端中,source 你的 ROS 2 主环境作为 underlay,这样你就可以在其上构建 overlay:
source /opt/ros/humble/setup.bash
. ~/ros2_install/ros2-osx/setup.bash
In this case you can use a normal command prompt, as we are not going to build any workspace in this terminal.
call C:\dev\ros2\local_setup.bat
然后进入工作空间的根目录:
cd ~/ros2_ws
cd ~/ros2_ws
cd \ros2_ws
在根目录中 source 你的 overlay:
source install/local_setup.bash
. install/local_setup.bash
call install\setup.bat
Note
source overlay 的 local_setup 只会把 overlay 中的包添加到你的环境中。
setup 会同时 source overlay 和它所在的 underlay,这样你就可以同时使用两个工作空间中的资源。
也就是说,source 你的 ROS 2 安装环境的 setup,然后再 source ros2_ws overlay 的 local_setup,就和直接 source ros2_ws 的 setup 一样,因为后者已经包含了前者的环境。
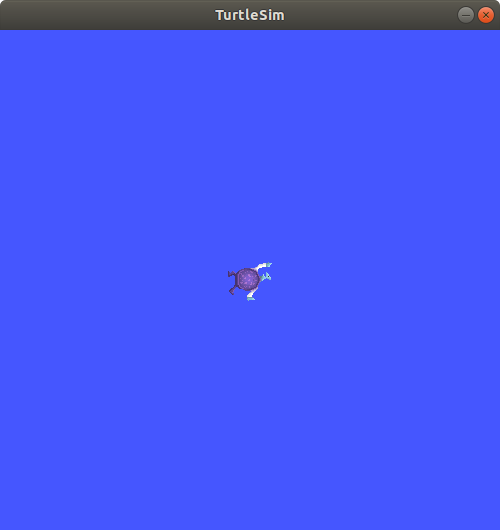
现在你可以从 overlay 运行 turtlesim 包了:
ros2 run turtlesim turtlesim_node
但是你可能会问:“我怎么知道这是 overlay 中的 turtlesim,而不是 ROS 2 自带的 turtlesim?”
让我们修改一下 turtlesim 包,这样就能看到效果:
你可以在 overlay 中单独修改和重新构建包。
overlay 会覆盖 underlay。
7 修改 the overlay
你可以修改 overlay 中 turtlesim 的标题栏,这样就能看到效果。
先找到 ~/ros2_ws/src/ros_tutorials/turtlesim/src 目录下的 turtle_frame.cpp 文件。
用你喜欢的文本编辑器打开 turtle_frame.cpp 文件。
找到 setWindowTitle("TurtleSim"); 函数,把 "TurtleSim" 改成 "MyTurtleSim",然后保存文件。
回到前面你运行 colcon build 的终端,再运行一次这个指令。
切到第二个终端(source overlay 的终端)再次运行 turtlesim:
ros2 run turtlesim turtlesim_node
你会看到 turtlesim 窗口的标题栏现在显示为 MyTurtleSim。

虽然你之前在这个终端中 source 了你的 ROS 2 主环境,但 overlay 会覆盖 underlay 中的内容。
打开一个全新的终端,只 source 你的 ROS 2 安装环境,就能检查它还是不是好的。 再次运行 turtlesim:
ros2 run turtlesim turtlesim_node

你会发现 overlay 中的修改并没有影响到 underlay 中的 turtlesim。
总结
在这个教程中,你 source 了你的 ROS 2 安装环境作为 underlay,然后在新的工作空间中克隆和构建包,创建了一个 overlay。 source overlay 会将 overlay 的安装路径添加到环境变量中,覆盖掉 underlay 中的同名包,你就能看到 overlay 中对 turtlesim 的修改了。
使用 overlay 是为了在少量包上工作时更方便,这样你就不用把所有东西都放在同一个工作空间中,每次都要重新构建一个庞大的工作空间。
下一步
现在你已经了解了创建、构建和 source 你自己的工作空间的细节,接下来可以学习如何 创建你自己的包。